How to Draw
| Site: | Joans-place |
| Course: | Art |
| Book: | How to Draw |
| Printed by: | Guest user |
| Date: | Friday, 24 October 2025, 6:24 PM |
Description
Drawing is a basic skill for artists
What is Drawing?
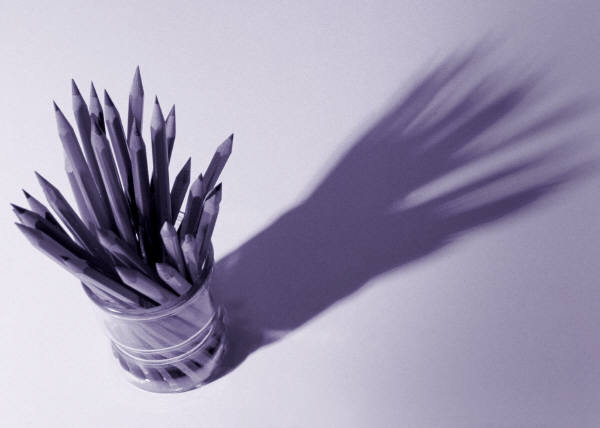
There are many sorts of drawing techniques, varying according to the effect the artist wants. A preliminary technique to some other medium or form — although distinct from the final product, such drawings also have intrinsic artistic value. Preliminary drawings include various exercises (e.g., contour drawing, gesture drawing, figure drawing, drawing from the flat), as well as sketches, studies, and cartoons.
Drawing has been highly appreciated since the Renaissance, largely because it implies spontaneity and an embodiment of the artist's ideas. Spontaneity has always been used to particular advantage in caricature.
This unit will provide an introduction to many aspects of drawing and hopefully you will find techniques that you enjoy!
Choice of mediums
IntroductionIn this lesson, you will examine various types of media: materials and tools that a designer chooses to help create a design. Media covers a wide range of materials because all sorts of things can be used in designing. Medium is the singular form of media.
Wax crayon, pencil crayon, pencil, paint, felt pen, ink, chalk, pastel, Plasticine™, clay, paper, fabric, dyes, yarn, wire, glue, wood, plastic, tape, styrofoam, and tin foil are a few materials that can be used to design. When different materials are combined to produce a piece of artwork, that artwork is called mixed media. For example, you might apply pencil over watercolor, or attach fabric to a paper sculpture.
Gesture Drawings
Introduction
A fly is buzzing around your head. Raise your hand and smack that insect. Did you miss? Try to hit it again.
What motions did your hand and body go through trying to eliminate the fly? Did your hand make wide, swishing movements? How would that look in a drawing? How would you draw something that happened so quickly? You can draw the movement someone is doing and you can capture the feeling, but you have to learn to give up detail.
A drawing that shows this movement is called a gesture drawing. You can imagine that such quick drawings will not be able to show details, like eyelashes or any facial features. Details are not important in gesture drawing.
The following videos show three different ways to approach gesture drawing but note that all three focus on speed and minimum detail.
Contour Drawing
IntroductionArtists look at problems as challenges. A contour drawing is an interesting and challenging technique used to develop a subject. It is also an informal test of your problem-solving skills.
In a contour drawing, you may use only one continuous line to draw the edge of a figure or object.
contour drawing: the drawing of the edge of a figure or object; drawing with one continuous line.
Reflection
Contour drawing is a painstaking, slow, controlled method of drawing. You must really look at the object. You must try to imagine that you are touching the edges of the form. A contour drawing takes a long time to complete as you must try to keep your line continuous. In a contour drawing, you could also show surface detail lines; for example, lines describing facial features and folds in clothing.
When you make a contour drawing, you must keep your eyes on the object or figure you are drawing and concentrate on directions and curves. Your eyes and hand must move at the same time. You must look at the object, not at your drawing hand or paper.
When you draw without looking at your paper, your first sketches will look strange, but don't be discouraged. Instead, relax and keep it fun. Practice, practice, practice. That's how the real artists do it. Remember, the more you practice, the more accurate your drawings will become.
Basic Pencil Shading
After a line drawing is done, it's always gratifying to add realistic shading to it. Shading makes the subject look three dimensional and solid.
Use an overhand grip for these exercises. Fill a sheet of scrap paper with broad marks made with the side of the lead until you're comfortable working with a pencil held this way.

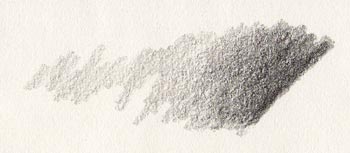
Make this kind of shading with the side of the lead held at a low angle. A back and forth motion creates a textured shading that's easy to control.
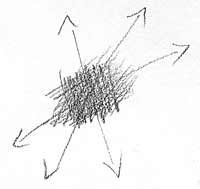 Here's an illustration showing the "crosshatching" of a pencil stroke. It's a very simple principle—you just do the pencil strokes in several different directions, one over the other! Each different direction adds more tone to the shading, and gets it progressively darker, and darker.
Perspective Drawing
Have you ever looked down railroad tracks and noticed that the far ends look much smaller than the ends nearer to you, and the gaps between the rails seem to narrow until the lines become one, just as they disappear over the horizon? This is because perspective helps you, the artist, to understand an object's location in relation to where you are and it helps you make your drawing of an object look more realistic. It is an important concept in industrial design and architecture.
You've already learned the basic way of drawing a perspective. On a new sheet of paper, draw again your horizon line, but this time - add two vanishing points, each of which is opposite to one another ( imagine drawing a segmented line ). Now, draw the lines outward from these two vanishing points and add vertical lines to make your cube. You will notice that the vertical lines appear to be parallel. You will feel like you are looking up at the top half and bottom half of the cube.
Like in one point perspective, you can make the object appear to be on top by just drawing lines above the horizontal line. This comes handy when you are drawing any flying objects like jets.
If you want to draw an aerial view or a " bird's eye view " - you may just draw anything below the horizon line to create an impression of looking down at it.
Negative Space
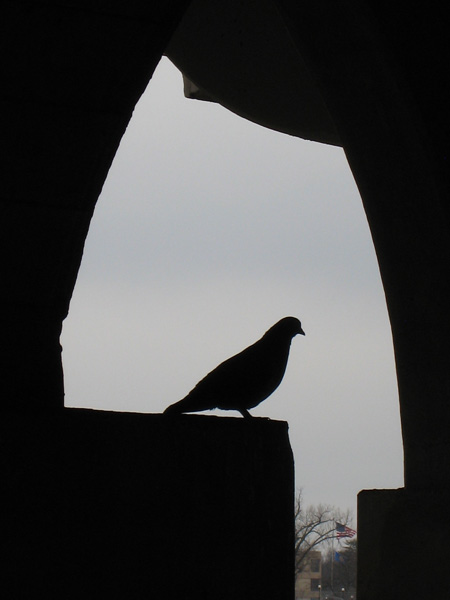
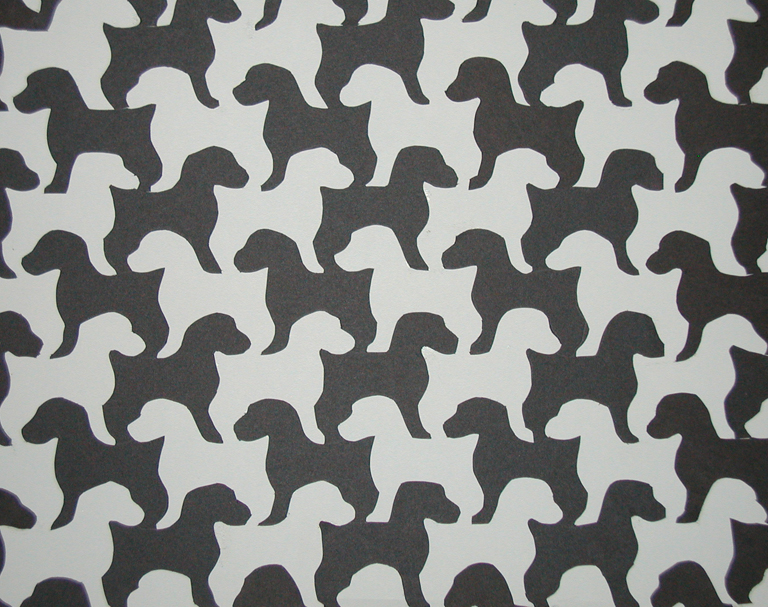
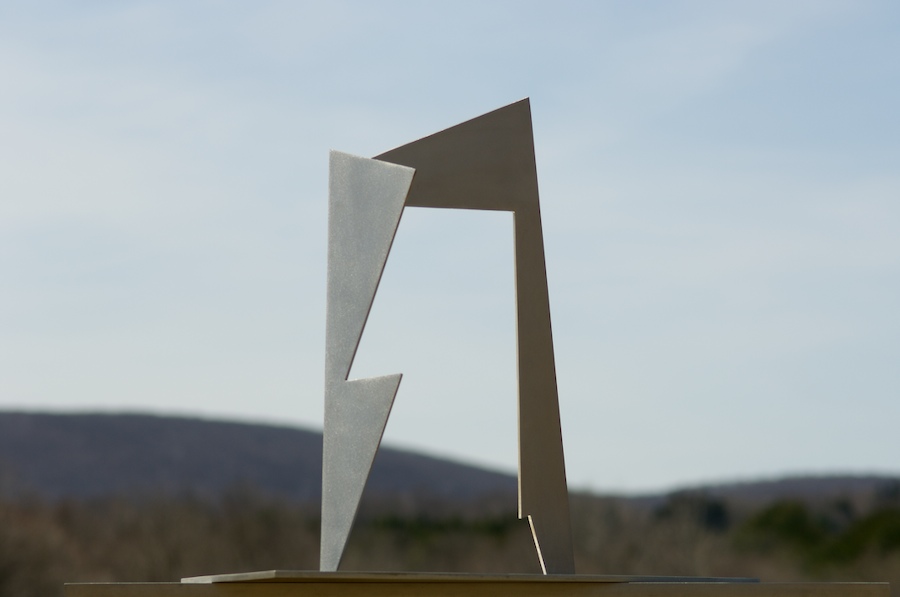
IntroductionIn a painting or drawing, the space around the object is just as important as the object itself. A good artist strives for a balance between the positive space (the object) and the negative space (the background) around it but have to plan for these spaces and use them wisely to create the atmosphere of the drawing. The object of this lesson is to work with this surrounding space. We can train ourselves to see the negative space as easily and instinctively as we see the object itself.
Reflection
When we look around us we tend to see recognizable objects rather than the unrecognizable space between the objects. Optical illusions often use this fact to trick the eye. Perhaps you've seen the vase-face illusion?
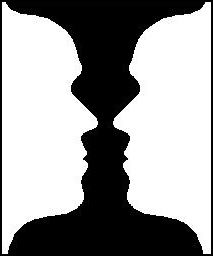
You can see either two faces or a black vase. It is almost impossible to see both at the same time because one defines the other. The black area defines the shape of the faces, and the white spaces define the vase.
How?
Flatten the object in your minds eye and allow yourself to really focus upon the object. Then, make yourself focus instead upon the space around the object. Once you have become used to seeing things in two ways (as solid objects, and as objects surrounded by negative space), make a drawing whereby instead of drawing the object, you draw the negative spaces around the object.
Often when doing a drawing in this way, you'll finish and suddenly notice how accurate it looks! Because the shapes of the negative spaces are less recognizable, you really have to look carefully to see them - you can't second guess them. Instead of letting your left brain tell you 'you're drawing a chair', your right brain sees only shapes, draws those, and the end result is a chair. Use this technique whenever you feel you are struggling with drawing something the way it looks. Switch your mind to seeing the negative space, and try drawing that instead.
To help you see the negative space you can make a viewfinder (a piece of card with a window cut into it of the same proportions as your drawing paper). Hold the viewfinder in front of your eye, and frame the thing you are drawing. Use the frame of the viewfinder to create a boundary for the negative space.
The terms positive and negative can also be described using the following:
- foreground/background
- figure/ground
- figure/field
- solid/void
Drawing Upside Down
IntroductionYour brain is split into two halves called the left and right hemispheres. The left hemisphere rules the right side of your body and the right hemisphere rules the left. (That is why a blood clot in the right side of the brain affects the left side of the body in stroke victims.) There are many other functions that utilize both sides of the brain—cooking, driving, thinking, experimenting, inventing, and studying—to name only a few.
When you perceive empty space and have trouble recognizing it as a shape, the brain switches the problem over to the right hemisphere. The right hemisphere seems to be more flexible and interested in any unknown situation. In this lesson we will try an approach that helps us switch to the less dominant right side of the brain.
Because we are used to seeing the world upright, our brains develop almost a short-hand way of recognizing things. For instance, when out on a walk you may see many things - trees, birds, cars, etc. - but if you were to draw a 'tree', 'bird' or 'car' you would most likely use a symbol. The left side wants to simplify things. But if you can tap into the right side of your brain and remove the rules about what a tree should look like (has a few branches, a trunk, and some green leaves or is a green shape), you come much closer to drawing what a tree really looks like (has many branches, the trunk is often rough and there are many leaves or needles). Upside-down drawing is a technique that helps you turn off the left side and better use the right.
Check out this video:
http://youtu.be/QWWRMRZYygw
(The best reference text here is: Edwards, B. (1989) Drawing on the right side of the brain. New York: G.P. Putman's Sons. ISBN: 0874775132)
Just for fun:
Landscape Drawing
IntroductionYou have worked with many different drawing techniques in this unit. We want to examine more closely how we look at the word around us and use our perception and drawing techniques to create a landscape drawing.
Viewfinder
Often when a painter is faced with a scene, there's simply so much that's
 appealing it's hard to choose what to focus on. This is where a viewfinder comes in useful, as it helps you focus on particular parts of the scene, enabling you to decide what will make the best composition, both in terms of focus and format. To help you see portions of your environment or possible focal points, you can make a viewfinder (a piece of card
  with a window cut into it of the same proportions as your drawing paper). Hold the viewfinder in front of your eye, and frame the thing you are drawing. Use the frame of the viewfinder to create a boundary for the area you want to draw.
 If you look at this landscape, you'll quickly see the potential for various landscape paintings. By using a viewfinder to isolate just a part of the landscape and to frame it in a particular way, it's easier to judge whether a composition is pleasing or not. For instance, you could crop out all the foreground, including the whole town, for a composition that focuses on the mountains. As a composition it's strong, yet for a landscape painting doesn't give you much of a feeling for the area.
If the town is included, as here, the whole feeling of the composition changes.
 Suddenly the mountains aren't the primary focus, but a background. The town and the farmlands dominate, yet there isn't a strong focal point to draw the viewer into the painter. As a composition it's rather mundane.
If you move the viewfinder to the right, so that the mountain runs off the left edge of the painting and the open farmland runs from the foreground off into the distance to the right, you get a much more rural scene. Yes, the town is there, but the focus is on the farmlands and the feeling of distance they create as they vanish into the horizon. As a composition, it is quite pleasing, but you'd need to decide whether you were happy with the very square format.
Depth Perception
 Depth is how deep or three-dimensional an artwork looks. Artists create depth and space with a variety of techniques and tricks that fool the eye. The illusion of space can be created using color, line, and shape. Western artists in the 16th century developed a mathematical system to create the illusion depth called perspective.
Portrait Drawing
Introduction"When drawing a face, any face, it is as if curtain after curtain, mask after mask falls away, until a final mask remains, one that can no longer be removed, reduced. By the time the drawing is finished, I know a great deal about that face, for no face can hide itself for long. But although nothing escapes the eye, all is forgiven beforehand. The eye does not judge, moralize, criticize. it accepts the masks in gratitude as it does the bamboos being long, the golden rods being yellow."
- Frederick Franck The Zen of Seeing
As the quote indicates, the first task we have in doing a portrait is careful observation of your model or photograph. Then you begin to draw.
The first step of drawing the human face is proportions. The basic shape of the front-facing human head is like an egg so start by drawing an egg, small end pointing down. Next, divide the egg in half both vertically and horizontally. The eyes will be drawn on the horizontal line. Divide the lower half of the face; the bottom of the nose will land on this line. Divide the lowest section again; the bottom of the lips will land on that line. Watch the following videos to see how these simple proportions are used...